
Last Season’s Boots. This Season’s Feet.
The FitLab Sports at-home ski boot check
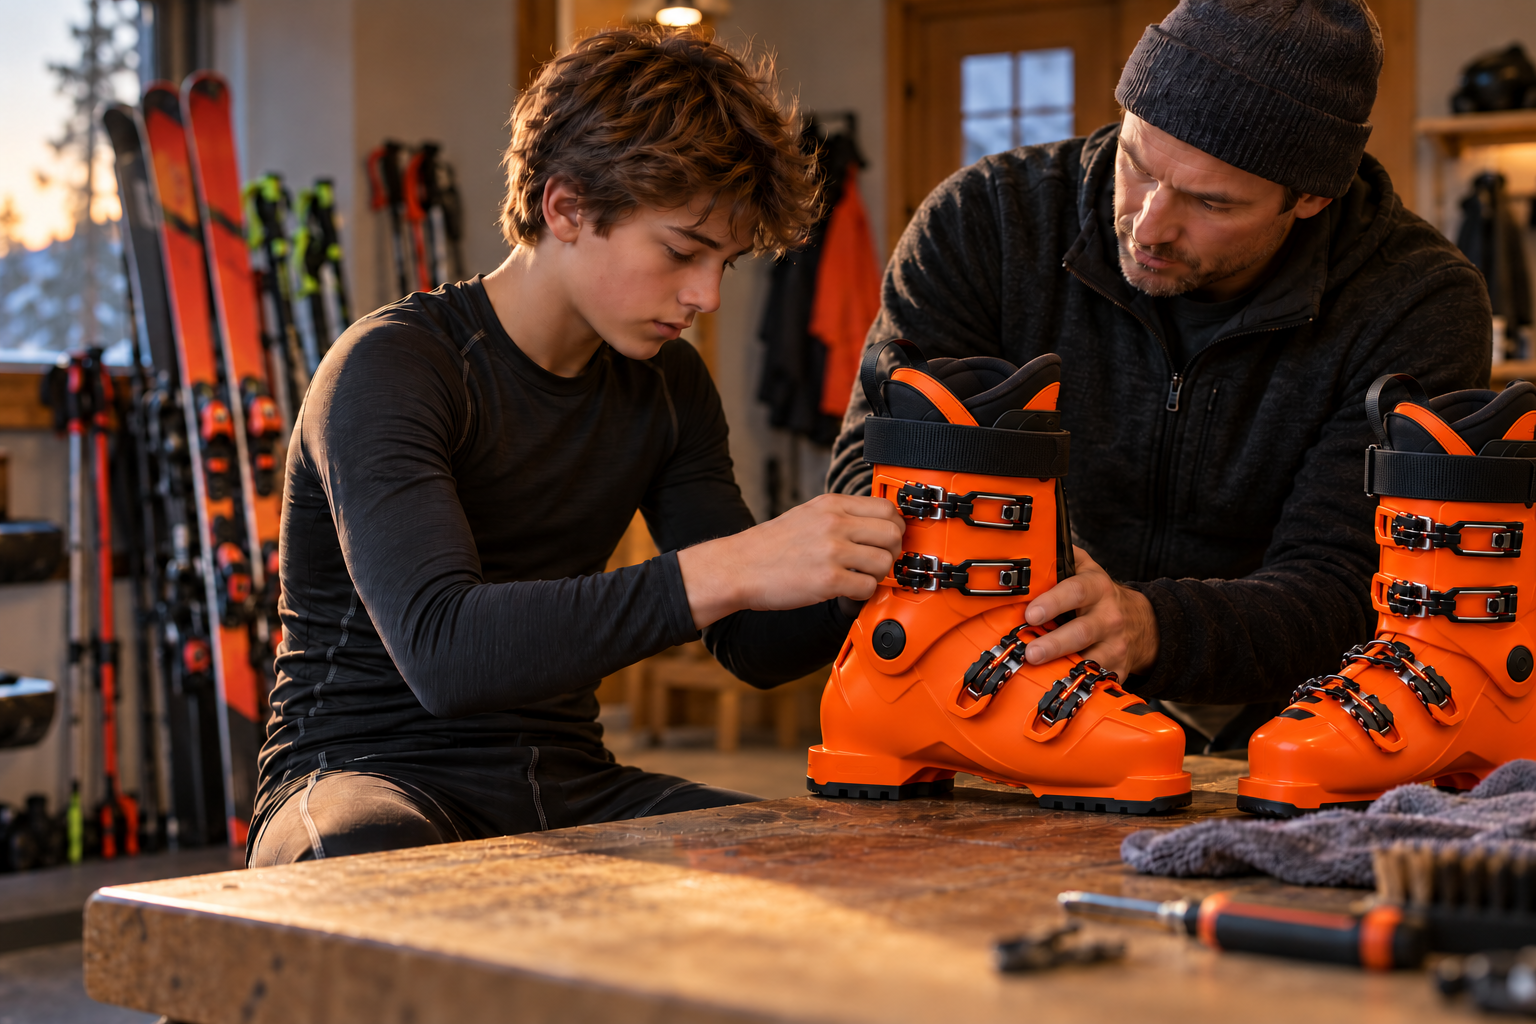
The buckles close. The boots look familiar. But do they still support the athlete wearing them?
Before the first training day, take the boots out of the bag and check them together. Start with three things: condition, contact, and movement. An at-home check helps identify questions. Work with a qualified ski boot technician / boot fitter to confirm sizing, fit, and whether the boot’s support and flex suit your athlete. A qualified binding technician should check the boot–binding setup.
01 / Inspect the outside
Buckles. Strap. Shell. Soles.
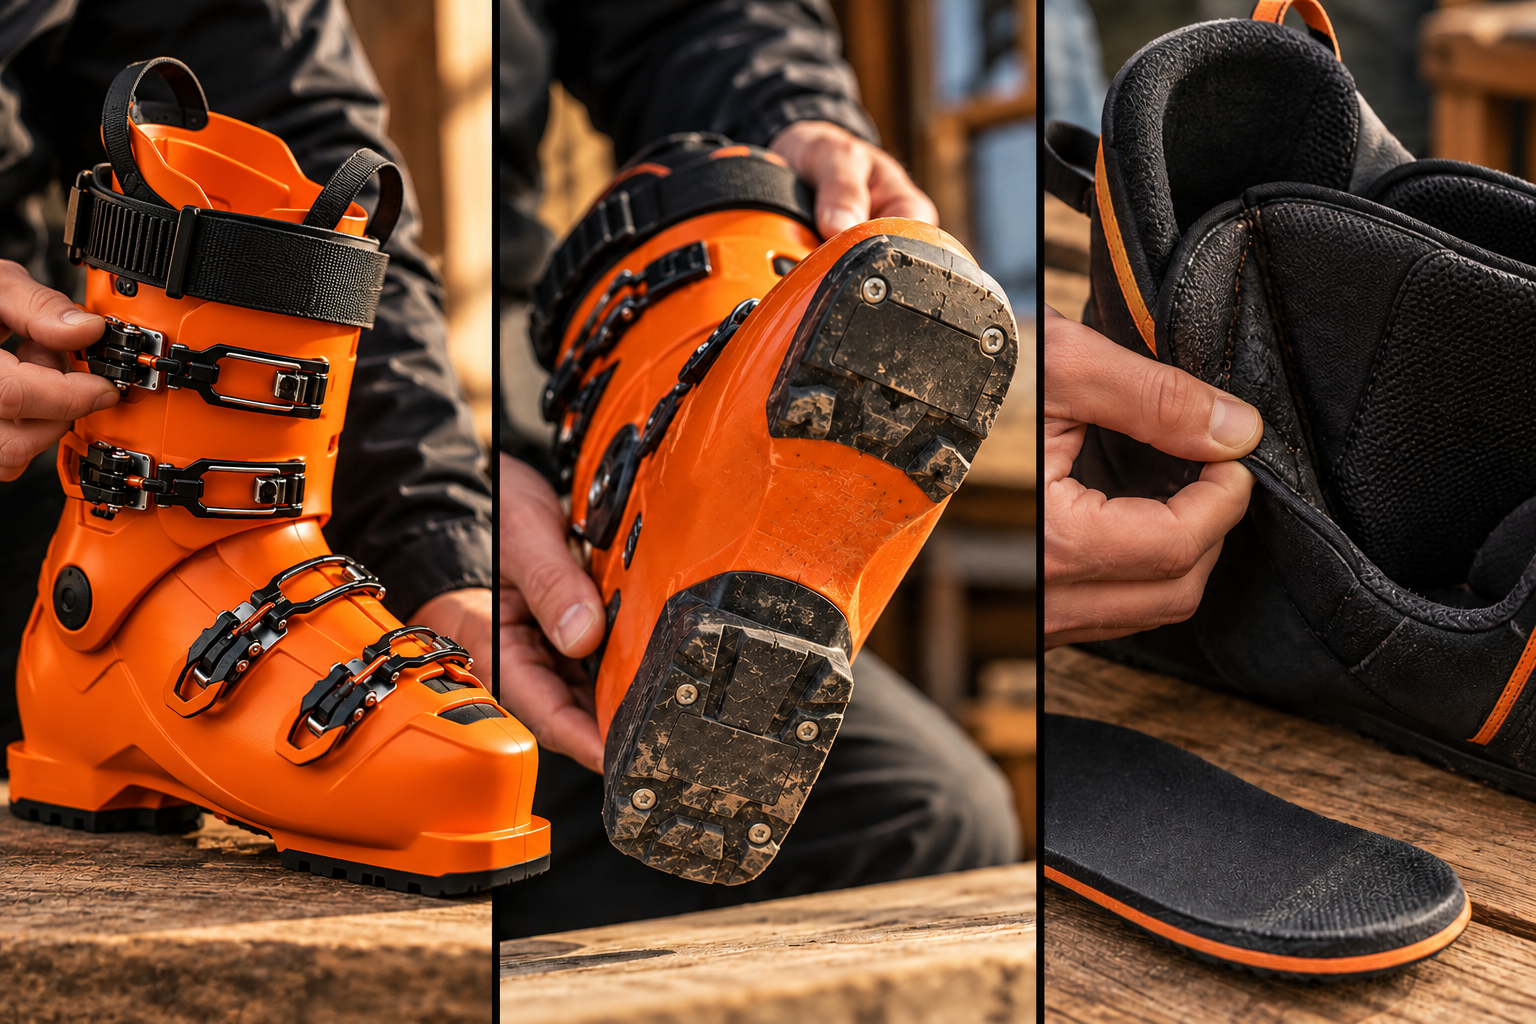
- Work every buckle. Look for sticking, bent parts, missing hardware, or closures that will not hold.
- Check the strap and shell. Look for fraying, damaged fastening surfaces, cracks, or deformation.
- Turn the boots over. Clean the toe and heel areas. Look for substantial wear, broken pieces, or loose sole components.
Next step: Have damaged hardware or worn soles assessed before skiing. A qualified ski technician should confirm the boot–binding setup when boots or sole types change.
02 / Look inside
A familiar shell can hide a changed fit.
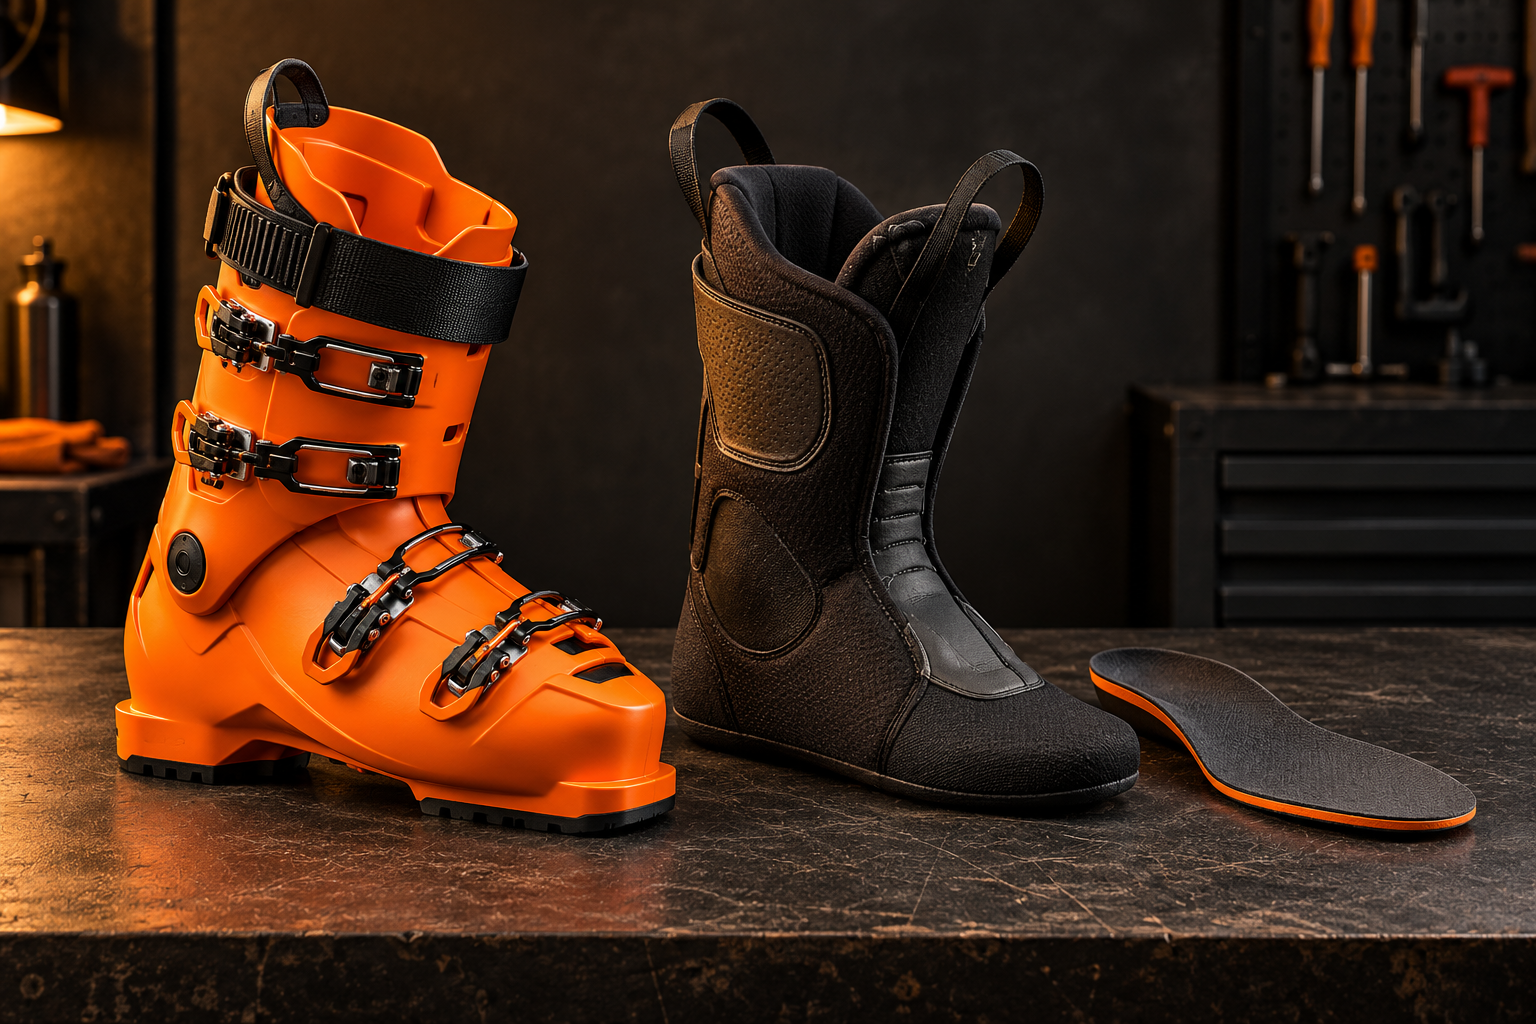
Remove the liner from the shell. Check for holes, damaged seams, folded material, and worn heel areas. Confirm that the footbed is present, flat, and correctly seated.
Ask the athlete: “Are you tightening these more than you used to?” A liner may look intact even when its support feels different.
Stock insole check: look at the toes
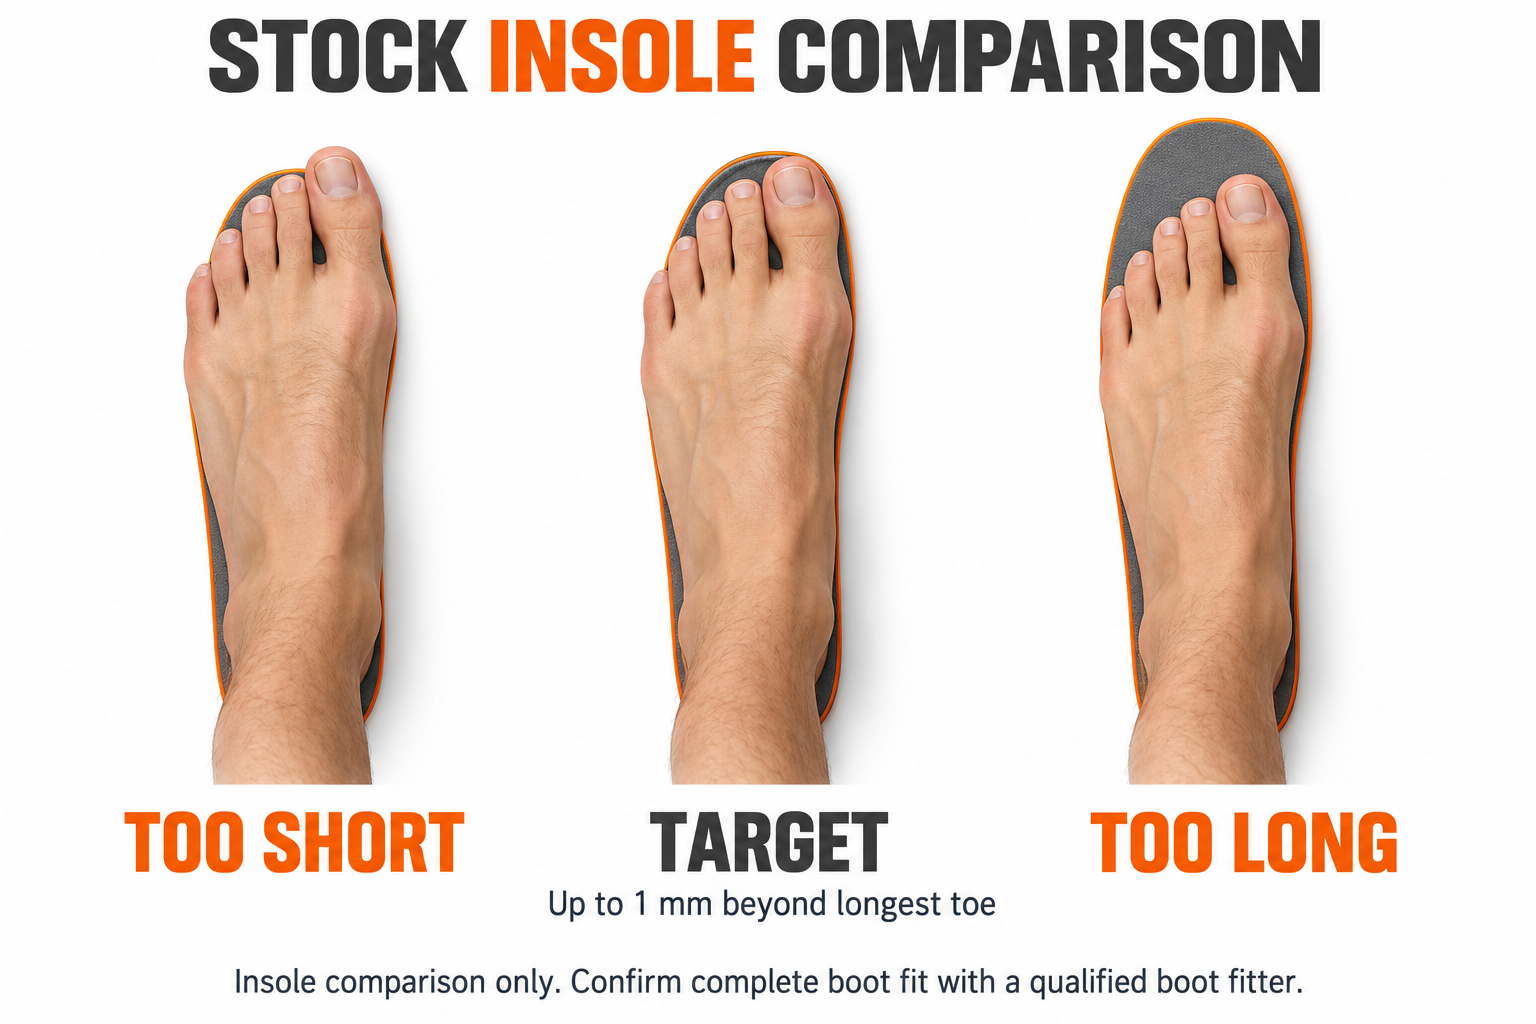
Remove the stock insole and have the athlete stand on it with the heel aligned and toes relaxed. Look at where the toes sit relative to the front edge and whether the foot extends beyond the sides. Compare both feet. In the illustration, the target is a very thin sliver of stock insole—up to 1 mm—visible beyond the longest toe. Toes extending over the front show an insole that is too short; a large empty extension shows one that is too long. This is a visual insole reference, not a universal boot-sizing allowance or confirmation of a perfect boot fit. Have a qualified boot fitter assess the complete fit.
Liner squeeze check: feel the contact
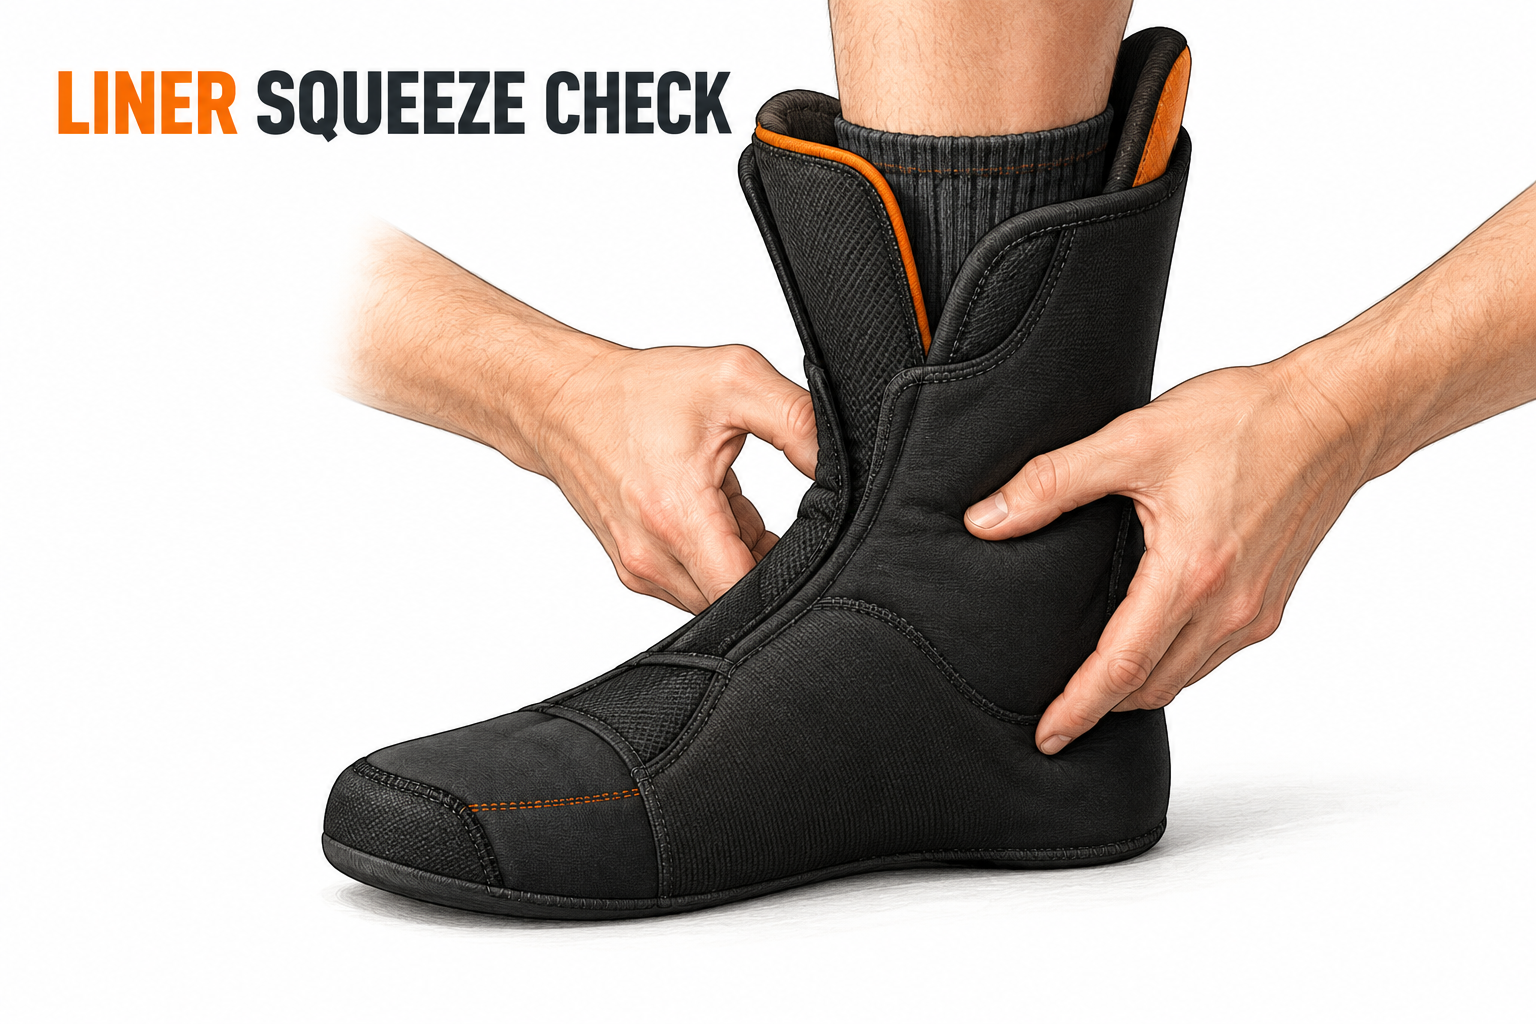
Return the footbed to the liner. With the athlete seated and their foot inside the liner, gently squeeze the liner around the heel and ankle. Notice how much liner material you can gently gather or move before you feel contact with the foot. Does the liner make contact promptly, or can you pinch a loose fold or move it noticeably before reaching the foot? Check around the heel, ankle, and over the instep without pulling hard or squeezing through discomfort. Ask the athlete when and where they feel contact.
There is no single pinch amount that confirms a good fit: liner thickness, construction, and condition vary. A loose fold or substantial movement before contact is an observation to show your boot fitter, especially if the athlete also reports heel lift or sliding. Do not confuse normal padding compression with empty space. Keep the check gentle; stop if uncomfortable.
This is an informal way to notice the liner’s condition and contact. It cannot confirm shell fit or overall boot suitability. Bring those observations to a qualified boot technician / boot fitter.
Next step: Note what changed and bring the liner and footbed to the fitting appointment. Discuss growth allowance rather than automatically choosing a larger boot.
03 / Try on. Move. Listen.
Replace “Do they fit?” with better questions.
Reassemble both boots correctly. Use one thin pair of ski socks, position the tongues, and fasten the closures normally without forcing them. On a stable, nonslip surface with support nearby, let the athlete stand and make gentle ankle and knee movements.
| Ask the athlete | Listen for |
| Can your toes lie naturally? | Curling, jamming, or a new uncomfortable contact point. |
| Does your heel feel supported? | Lifting or sliding inside the boot. |
| Where do you feel the boot? | Uneven contact, painful spots, tingling, or numbness. |
| Can you move against its support? | Difficulty making a controlled movement or maintaining balance. |
The goal: secure support without pain. Stop if discomfort appears. Record the location and what the athlete was doing when it happened.
Fit is more than a number
A shell-fit assessment adds useful information, but one heel-gap measurement cannot describe the whole fit. Shell width and volume, liner construction, foot shape, and intended use also matter. Have a qualified fitter perform or interpret the assessment; avoid treating a finger-width estimate as a pass/fail rule.
For U14 and younger: connect the equipment decisions
Use this check alongside the U14 and Below Equipment Calculator when reviewing the athlete’s setup for the season. The guide provides context for equipment decisions; your athlete’s individual boot fit still needs hands-on assessment.
Bring the guide—and your observations—to a qualified ski boot technician / boot fitter. Discuss foot shape, growth, heel hold, shell volume, cuff support, and usable flex. Choose the boot for the athlete in it today, with growth allowance agreed with the fitter.
If using the guide to inform race equipment choices, confirm the requirements that apply to the athlete’s program and events with the coach.
The FitLab Sports connection
Equipment should support useful movement.
Posture: Does the athlete have the range of motion needed to work with the equipment?
Position: Does the boot hold the foot securely while allowing the athlete to move and stay balanced?
Placement: Can the athlete apply force through the boots toward the intended ski outcome?
Patterning: Can the athlete repeat the movement in a simple task and carry it into skiing?
Leave the check with one clear next step
Write down which boot, where, when, and what changed. Bring the boots, footbeds, usual ski socks, and notes to a qualified boot technician / boot fitter. Ask them to assess the complete fit rather than relying on the size label or a single clearance measurement. Share relevant equipment changes with the coach.
The next step might be a repair, an adjustment, or confirmation that the boots remain suitable. Start with the athlete’s observations.
Before the first run: check the equipment. Listen to the athlete. Make a plan.
About Jason Barcoff
Jason Barcoff | FitLab Sports
Jason Barcoff is a member of the Masterfit University ski boot instructor staff. Through FitLab Sports, he connects boot fit, equipment, and movement analysis to help athletes, parents, and coaches better understand athlete development. His approach encourages clear observations and collaboration with qualified boot technicians and boot fitters.
Images are AI-generated editorial illustrations. This at-home check supports a conversation with a qualified boot fitter; it does not establish complete fit.